Understanding the Starlink Mini Roof Rack Mount
Overview of Features
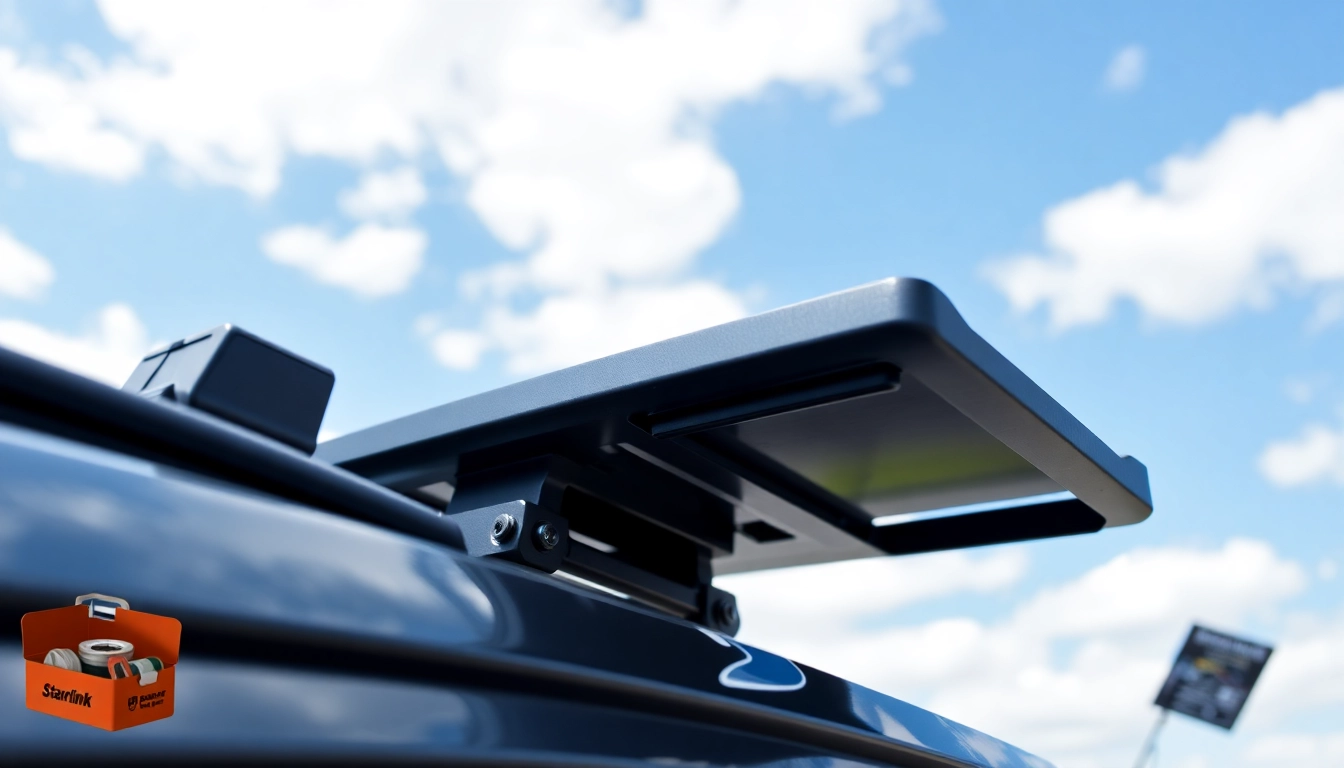
The starlink mini roof rack mount is designed to offer users a reliable and robust solution for installing their Starlink satellite dishes on vehicle rooftops. Its design is based on innovative technology that ensures optimal signal reception while providing security against harsh weather conditions. The mount is made from durable materials that resist corrosion and can withstand varying temperatures. Flexibility is another key feature of this mount, as it allows for easy adjustments to fit different types of vehicles. It generally includes a template for drilling, reinforcing brackets, anti-slip pad, and the necessary fasteners to secure the mount effectively.
Benefits of Using a Roof Rack Mount
Using a roof rack mount for your Starlink system has several advantages:
- Enhanced Signal Reception: Elevating the Starlink dish above obstacles like trees and buildings significantly improves signal quality.
- Increased Stability: Roof mounts provide a stable platform for the satellite dish, minimizing sway and vibrations that can disrupt connection quality.
- Space Efficiency: A roof mount frees up space inside the vehicle, allowing for more cargo room while reducing the vehicle’s clutter.
- Flexibility: Roof racks allow for easy repositioning, catering to changing signal environments or user preferences.
Common Use Cases
The starlink mini roof rack mount is particularly beneficial in various scenarios:
- Traveling: For users on road trips or camping expeditions, a roof mount ensures reliable internet connectivity, allowing for seamless work or leisure activities.
- Off-Grid Living: Individuals living in remote areas where traditional internet is unavailable can utilize the roof mount for consistent satellite access.
- Mobile Businesses: Businesses that rely on mobile internet connections, such as food trucks or mobile offices, can benefit from the adaptability and efficiency of a roof-mounted system.
Installation Process of Starlink Mini Roof Rack Mount
Preparation and Tools Needed
Before embarking on the installation of your roof rack mount, it is crucial to gather all necessary tools and components. The basic toolkit should include:
- Drill with appropriate bits
- Measuring tape
- Level to ensure proper alignment
- Screwdriver
- Protective gloves and goggles
Ensure the vehicle’s roof is cleared of any debris and washed to prevent scratches during installation.
Step-by-Step Installation Guide
Here is a straightforward step-by-step guide to properly install your starlink mini roof rack mount:
- Locate the Optimal Position: Choose a flat area on the vehicle’s roof, ensuring it’s free from obstructions that may impede the satellite signal.
- Mark Installation Points: Using the included template, mark where you will drill the holes for mounting. Ensure everything is level before proceeding.
- Drill Holes: Carefully drill holes at the marked points, being cautious not to damage the vehicle’s integrity.
- Secure the Mount: Attach the mount to the roof using the provided screws and brackets, ensuring it’s tightly secured.
- Attach Dish: Once the mount is firmly in place, attach the Starlink dish according to the dish installation instructions.
- Test Stability: Before heading out, give the mount and dish a gentle shake to test their stability.
Safety Considerations During Installation
Safety is of utmost importance during installation. Here are some essential safety guidelines:
- Always wear protective gear including gloves and goggles.
- If working on a steep vehicle or ladder, use harnesses or additional safety equipment.
- Ensure you have a clear area around you to avoid accidents while drilling.
- Be mindful of the vehicle’s roof storage, avoiding any electrical components when drilling.
Optimal Positioning for Performance
Understanding Signal Gain
The positioning of your satellite dish significantly affects signal quality. It’s essential to recognize how angles and obstructions impact performance:
- Elevation: Mounting the dish at a higher elevation reduces the potential obstruction from nearby structures.
- Angle of Mount: Adjusting the mount’s angle can help direct the dish toward the satellite for optimal signal reception.
- Avoiding Interference: Always make sure that the path between the dish and the satellite is clear of trees, buildings, and other obstacles.
Testing Different Mounting Angles
To determine the best position for your system:
- Preliminary Test: Initially install the mount without securing it. Temporarily place the dish and observe signal levels.
- Adjust Angles: Experiment with different angles and positions, while continually monitoring the signal strength through the Starlink app.
- Secure Optimal Position: Once the optimal position is found, secure the dish to the mount.
Environmental Factors Affecting Performance
Multiple environmental factors can influence the performance of your Starlink system:
- Weather Conditions: Heavy rain or snow can temporarily disrupt signal clarity.
- Physical Obstructions: Relocate the dish if nearby trees or other structures block the satellite’s line of sight.
- Electromagnetic Interference: Consider the proximity of other electronic devices that may create interference.
Maintenance Tips for Starlink Mini Roof Rack Mount
Cleaning and Care Guidelines
Maintaining a clean and functional roof mount is crucial for long-term performance. Here are some guidelines:
- Regular Inspections: Check the mount for any signs of rust or wear. Tighten any loose screws that may develop over time.
- Cleaning: Use a soft cloth with mild detergent to clean the mount regularly, especially after exposure to harsh weather.
Regular Inspection Checklist
Establish a routine maintenance schedule to ensure everything functions optimally. Your checklist should include:
- Inspecting for loose or missing screws and brackets
- Examining the dish for damages or debris
- Checking the mount base for signs of wear
Common Issues and Solutions
Despite its robust build, issues may arise. Here are some common problems and their solutions:
- Signal Dropouts: Make sure the dish is clear of obstructions. Adjust the mount angle for better reception.
- Loose Mount: If you notice wobbling, check and tighten all screws and brackets.
- Corrosion: Activate preventative measures, such as a protective spray, to mitigate rust on metal parts.
Comparative Analysis of Roof Rack Mounts
Feature Comparison Against Other Mount Types
When compared to other mounting solutions, the starlink mini roof rack mount provides several distinct advantages:
- Ease of Installation: Roof mounts are designed for straightforward installation without requiring extensive expertise.
- Durability: Built with robust materials that withstand outdoor conditions far better than temporary solutions.
- Signal Optimization: The height advantage with roof mounts allows for better satellite signal reception.
User Reviews and Feedback
Feedback from users who have installed the starlink mini roof rack mount overwhelmingly highlights positives such as enhanced signal quality and sturdy construction. Users emphasize the value of being able to avoid obstructions which were previously affecting their internet connectivity. Additionally, many note the aesthetic integration of the mount with their vehicle’s design.
Conclusion: Choosing the Right Mount for Your Needs
Deciding on the right mount can dramatically affect your overall experience with your Starlink system. The starlink mini roof rack mount stands out for its excellent performance, reliability, and ease of installation. By understanding its features, benefits, and maintenance needs, users can maximize their satellite internet experience. Furthermore, making informed decisions while considering personal use cases will ensure that you select a mount that meets your requirements effectively.