Understanding the Basics of Drone Photography
Drone photography has gained immense popularity over the last decade, offering enthusiasts and professionals alike the opportunity to capture stunning aerial images. Whether you are a seasoned photographer or just a hobbyist, understanding the basics of drone photography is crucial to mastering this art form. From equipment selection to legal regulations, a solid foundation is essential for achieving breathtaking results. To dive deeper into effective techniques, explore these drone photography tips that can elevate your skills.
Essential Equipment for Stunning Shots
The first step toward successful drone photography is selecting the right equipment. Drones come in various models, each offering unique features suited to different types of photography. Here are some considerations to keep in mind:
- Camera Quality: Look for drones with high-resolution cameras, ideally equipped with at least 12 megapixels. Some models even offer 4K video capabilities, providing crisp images and videos.
- Stabilization Technology: Invest in drones with advanced stabilization features, such as a gimbal, to reduce motion blur and produce smooth footage.
- Battery Life: Ensure the drone you choose has a decent flight time, typically between 20 to 30 minutes, to maximize your shooting opportunities in one flight.
- Range and Connectivity: Evaluate the range of the drone’s remote control. Greater distance can allow you to explore vast landscapes without losing connection.
Key Settings for Drone Cameras
Once you have your drone, it’s crucial to familiarize yourself with its camera settings. Proper settings can drastically affect the quality of your images. Here’s what to focus on:
- ISO Adjustment: Keep the ISO as low as possible to reduce noise in your images while still allowing the sensor to capture adequate light.
- Aperture Control: A wider aperture (smaller f-number) allows more light but can reduce depth of field. Experiment with aperture settings based on your desired effect.
- Shutter Speed: Understand shutter speed relative to your shooting environment. Faster speeds can freeze motion but require more light, while slower speeds can create beautiful motion blur.
Drone Regulations Every Photographer Should Know
Before taking flight, it is imperative to understand the legal landscape surrounding drone photography. Each country has specific regulations intended to keep airspace safe and responsible:
- Registration: Many countries require drone owners to register their drones, especially if they exceed a certain weight.
- Flight Permissions: Familiarize yourself with local laws regarding where you can and cannot fly. Some areas may be restricted due to safety or privacy concerns.
- Safety Guidelines: Always adhere to safety guidelines, which include maintaining line-of-sight with your drone, avoiding people and vehicles, and checking for no-fly zones.
Drone Photography Tips for Captivating Landscapes
Capturing stunning landscape photographs takes more than just flying your drone to a favorite location; it involves strategic planning and thoughtful execution. Here are key elements to consider:
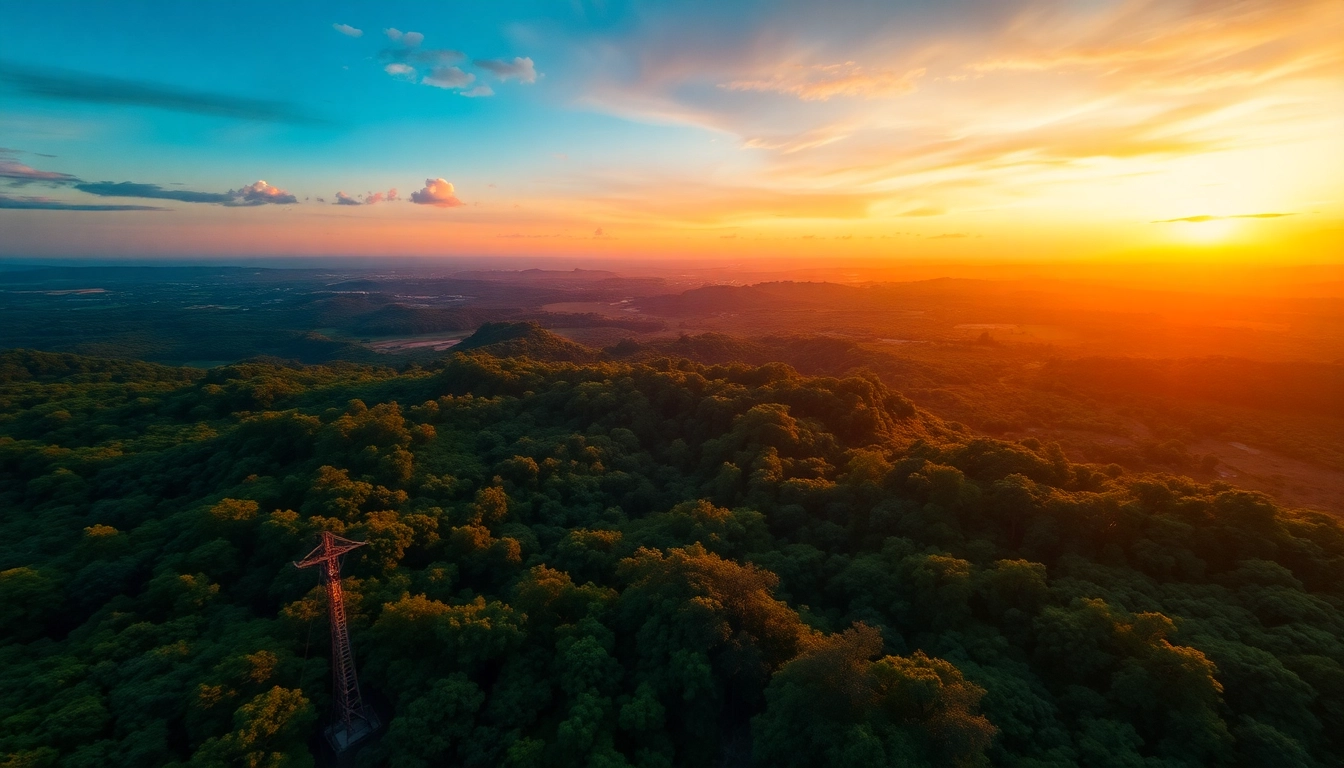
Choosing the Right Time of Day for Shooting
The time of day plays a significant role in the quality of your photographs. The golden hours—shortly after sunrise and just before sunset—offer soft, diffused light that enhances colors and reduces harsh shadows. Consider the following:
- Morning Light: Early morning often produces misty conditions and softer lighting, ideal for capturing serene landscapes.
- Evening Light: The warm hues during sunsets can create breathtaking images, especially over water or mountains.
Utilizing Natural Lighting for Enhanced Images
Natural light is a photographer’s best ally. To utilize it effectively:
- Face the Light: Position your drone so that the light hits your subject directly, illuminating it and creating depth.
- Experiment with Shadows: Include interesting shadow play for added perspective and drama. Drones allow for unique angles that emphasize these effects.
- Time of Year Considerations: Season affects natural light dramatically. Fall may provide more vibrant colors, while winter can yield stark contrasts and shadows.
Framing Techniques to Enhance Composition
Composing your shot carefully will enhance its visual impact. Employ these techniques for effective framing:
- Rule of Thirds: Divide the frame into a grid of nine sections. Place key elements along the lines or intersecting points for a balanced composition.
- Leading Lines: Use natural lines within the landscape to guide the viewer’s eye toward the main subject.
- Foreground Interest: Incorporate interesting elements in the foreground to create depth and context within the image.
Advanced Drone Photography Techniques
With the basics mastered, you can begin to explore advanced techniques that can set your work apart in the drone photography community. Here are some avenues to consider:
Mastering Aerial Perspectives and Angles
One of the greatest advantages of drone photography is the ability to capture perspectives unavailable to traditional photography. To take advantage of this:
- High Angles: Shooting from high above can provide context to the landscape, making the images more informative and visually striking.
- Low Angles: Flying just above the terrain can add a unique perspective and create a sense of grandeur for subjects.
- Dynamic Angles: Experiment with tilting the camera to add a sense of motion or to explore the symmetry of your subject.
Using HDR for Greater Dynamic Range
High Dynamic Range (HDR) photography can dramatically enhance the visual quality of your images, especially in challenging lighting conditions.
- HDR Techniques: Create multiple exposures of the same scene at different settings and merge them in post-processing to produce a balanced image that highlights both shadows and highlights.
- Auto HDR Settings: Some advanced drones have built-in HDR functionality that can capture images automatically. Familiarize yourself with how it operates to utilize its features effectively.
Incorporating Motion for Dynamic Shots
Motion can add a sense of dynamism to your imagery. Here are tips on incorporating movement into drone shots:
- Tracking Shots: Capture the movement of subjects or landscapes as your drone tracks along their path.
- Reveal Shots: Slowly rise or tilt to reveal hidden elements of the landscape, creating an enticing visual narrative.
- Time-lapse Photography: Consider using your drone for time-lapse sequences, showcasing the passage of time in landscapes.
Common Challenges in Drone Photography
Every photographer will encounter challenges, especially when working with drones. Understanding potential hurdles will better prepare you to overcome them:
Navigating Poor Weather Conditions
Weather can be unpredictable and significantly affect your drone photography. Here’s how to best prepare:
- Check Forecasts: Look for conditions free from rain, strong winds, or fog that can limit visibility and drone stability.
- Dress for Success: If weather is inclement, ensure you and your equipment are prepared for the conditions to avoid equipment damage.
Addressing Battery Life and Flight Time
Battery life is a common constraint in drone photography. Effective management can extend your shooting ability:
- Plan Your Flight: Before launching, have a clear idea of your flight path and planned shots to avoid wasting battery on unnecessary flights.
- Multiple Batteries: Invest in additional batteries to allow for extended shooting sessions without interruption.
- Battery Maintenance: Regularly check and maintain batteries, ensuring they are charged and functional to avoid surprises.
Solving Stability and Control Issues
Control can be challenging, particularly in windy conditions or complicated terrains. Here are solutions:
- Flight Familiarization: Take time to practice flying in open areas before attempting complex shots, enhancing your control.
- Use GPS Mode: Utilize GPS features for stabilization, especially in challenging flying conditions.
Post-Processing Techniques for Stunning Results
Post-processing is essential in drone photography, allowing you to polish your images to perfection. These techniques can help enhance your final product:
Editing Software: Recommendations and Tips
Choosing the right editing software can make all the difference. A few commonly recommended tools include:
- Adobe Lightroom: Ideal for color correction and batch editing, allowing for quick adjustments across multiple images.
- Adobe Photoshop: Best for more intricate edits and manipulation of images at pixel level.
- Skylum Luminar: Offers powerful AI-enhanced features that can make editing both simple and effective.
Color Correction Techniques to Enhance Images
Good color correction can drastically improve your photos. Keep these tips in mind:
- Adjust White Balance: Correct any color casts by adjusting the white balance according to the lighting conditions.
- Enhance Colors: Utilize vibrance and saturation sliders to boost colors without compromising image quality.
- Reference Images: Utilize samples from the same environment and conditions to gauge optimal color corrections.
Creating a Cohesive Aesthetic for Your Portfolio
Lastly, refining your overall style will help create a recognizable portfolio. Here are steps to achieve this:
- Consistent Editing Style: Maintain a uniform approach to edits across your images to create a cohesive look.
- Theme and Subject Matter: Consider focusing your portfolio around specific themes or subjects that resonate with your audience.
- Regularly Update: Continuously add new work that aligns with your aesthetic to keep your portfolio fresh and engaging.